PRC ID photo requirements
The PRC photo rules for a board exam, renewal, or registration through LERIS — including the two PRC-specific ones most people miss.
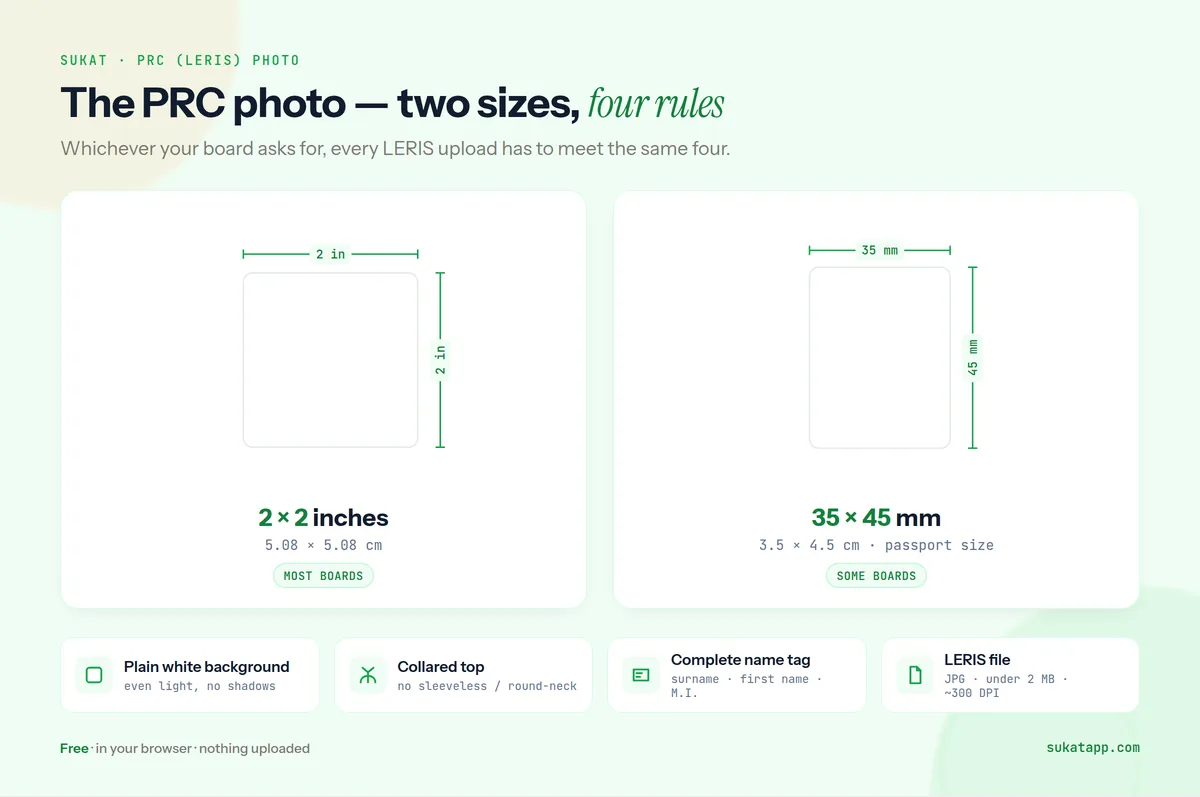
Prepare a PRC photo for LERIS
Once you've taken the photo in a collared top with your name tag, Sukat handles the size, background, and LERIS file.
Take the photo, then upload it
Wear a collared top and a name tag with your complete name, on a plain background in even light. Then drop the JPG, PNG, or HEIC onto Sukat's drop zone.
Crop to size and set white
Crop to passport size (35 × 45 mm) or 2 × 2, whichever your board requires, and set a clean white background if yours isn't already plain. Keep your face unedited.
Compress under 2 MB and download
For LERIS, choose JPEG and set Maximum File Size under 2 MB (around 300 DPI). Sukat keeps the photo sharp and within the limit. Upload it, or print it for your application.
When you need a PRC photo
The same white-background, collared, name-tagged photo comes up across the PRC journey. Here's where it applies.
Board exam application (LERIS)
First-time takers and repeaters upload a compliant photo with the online application — white background, collar, and name tag.
License renewal
Renew every 3 years through LERIS; the photo you upload appears on the new PRC ID (PIC).
New professional registration
After passing the board, initial registration asks for passport-size photos with a complete name tag on white.
Updating your LERIS photo
Refresh an old or non-compliant profile photo before you renew or apply.
OFW professionals
Manage a PRC renewal from abroad — prepare the digital photo to the LERIS spec and upload it.
Sorting other Philippine IDs too? An NBI Clearance is 2 × 2 — see NBI Clearance Photo Size. A Philippine passport is 35 × 45 mm — Passport Photo Size Philippines covers it.
Why Sukat for a PRC photo
Five things this tool gets right — and one thing it honestly leaves to you.
Both PRC sizes
Crop to passport size (35 × 45 mm) or a 2 × 2 square, whichever your board requires, at the right resolution.
Under the 2 MB LERIS limit
LERIS accepts a JPG up to 2 MB. Set the target and Sukat compresses to fit while keeping the photo sharp, so the upload isn't rejected for size.
Clean white background
Set the plain white PRC expects if your wall isn't white, without touching your face. Wear the collar and name tag yourself — Sukat sizes and formats, it doesn't add them.
iPhone HEIC handled
Drop an iPhone HEIC in and Sukat exports the JPG LERIS needs — no separate converter.
Private, in-browser
The photo never leaves your device — no account, nothing uploaded to a third-party server. Fitting for a professional ID.
Common reasons for rejection
LERIS rejects photos that don't meet the specs, and PRC offices turn away non-compliant photos on appointment day. These are the usual faults.
Incorrect dimensions
The wrong size for your board (passport size vs 2 × 2), a face cropped too tight, or a LERIS file over 2 MB.
Improper background
A coloured, patterned, or shaded background. PRC requires plain white, evenly lit, with no texture behind the head.
Shadows
Shadows on the face or the wall behind you. Light your face from the front and stand away from the wall.
Low image quality
A blurry, pixelated, or heavily compressed photo. Start from a sharp original — LERIS rejects low-quality uploads. Why it happens, and the fix, is below.
Missing PRC-specific items
No name tag, an incomplete name, a sleeveless or collarless top, or accessories. Wear a collared top and a name tag with your complete name.
Why the photo looks pixelated
Pixelation is the one rejection cause that cannot be fixed at upload time. A background can be replaced, a crop can be redone, a file can be resized — but detail that was never captured cannot be added back. If the photo looks soft or blocky in the LERIS preview, the damage happened before the file reached the portal.
The original was too small
A screenshot, a photo saved out of Messenger or Viber, or a face cropped from a group shot all start with far fewer pixels than an ID photo needs. Enlarging any of them to fill a 2 × 2 frame stretches the pixels that already exist rather than adding new ones. A photograph of a printed photo has the same problem for a different reason — that file has been through a print and a camera, and both stages cost detail.
As a practical floor, an ID photo at the usual 300 pixels per inch works out to roughly 600 × 600 pixels for a 2 × 2, or about 413 × 531 for passport size. PRC publishes a file-size ceiling rather than a pixel minimum, so treat those as the point below which softness starts to show, not as a stated requirement.
The file was compressed far below the ceiling
LERIS accepts a JPG up to 2 MB. A photo squeezed down to 100 KB to be safe is roughly twenty times smaller than the portal allows, and JPEG pays for that with blocking around the eyes, the hairline and the collar. The ceiling is a limit, not a target. Landing the file just under 2 MB satisfies the rule and leaves the detail intact.
The file was saved as JPG more than once
JPEG compression discards data every time it runs. A photo exported from a camera app, edited in one tool, re-saved in another, then compressed again has been through three rounds of loss. Each round is close to invisible on its own and obvious once they stack. Work from the original file and compress once, at the end.
What to do instead
- Start from the full-resolution file straight off the camera or phone — not a download, not a screenshot.
- Crop to the shape the board requires, 2 × 2 inches or 35 × 45 mm.
- Set a target size just under 2 MB and export as JPG.
Sukat handles all three in the browser, and the file never leaves the device. Binary-search targeting lands the export just below the ceiling instead of overshooting far under it, which is what keeps the photo sharp. The upload walkthrough is on the LERIS photo guide, and the full list of refusal causes on why PRC rejects a photo.
One caveat: if the photo is already soft at full resolution — camera shake, a smudged lens, low light — careful compression recovers nothing. Retake it.